Mobile Phone Tests
Sipfront provides the ability to integrate real mobile devices into your test scenarios. This is achieved by running the Sipfront mobile agent in your premises and connecting your phones to it via Bluetooth. The mobile agent runs either on a Raspberry Pi with the Sipfront image, or as a VM on a Linux host (a laptop or small PC) with a USB Bluetooth dongle; both behave the same way.
With this approach, you can test calls from SIP or WebRTC via your peerings to the mobile network and vice versa, utilizing the radio technology your phones are attached to, such as 4G or 5G.
Important
Use agent group names without whitespace for mobile tests, and do not boot the Raspberry Pi from a USB stick.
Requirements
In any case:
- Any phone (Android, Apple, ...) with Hands-Free support via Bluetooth (any reasonably newish phone with Bluetooth should work)
- A custom agent pool in the Account > Agent Pools menu
Plus one of the two platforms for the mobile agent:
| Raspberry Pi | Linux host with a Bluetooth dongle | |
|---|---|---|
| Hardware | Raspberry Pi 4 or 5 with 4GB of RAM (2GB works for a single agent), a 16GB microSD card (8GB minimum) | A Linux laptop or PC (x86_64 or arm64, e.g. Debian 12 / Ubuntu 24.04) with KVM, plus a USB Bluetooth dongle (tested: TP-Link UB500) |
| Software | Nothing, the SD card image is complete | QEMU (qemu-system-x86 or qemu-system-arm) and the Sipfront agent VM, see Running agents in a VM on your laptop |
| Best for | Permanent, unattended installations | Engineers with a laptop, e.g. a mobile test from a customer site, or trying it out without extra hardware |
Note
macOS and Windows hosts cannot hand a Bluetooth dongle to the VM, so mobile phone tests need a Raspberry Pi or a Linux host.
Installation
Both platforms are configured through the same sipfront.txt file; only where that file lives differs.
Option A: Raspberry Pi
- Download the latest Sipfront image for Raspberry Pi from the Sipfront CDN.
- Flash the image onto the microSD card using a tool like Balena Etcher. Check our Generic Raspberry Pi Installation Guide for more details.
- Reinsert the microSD card using your SD card reader on your machine where you flashed the image (it will show as
bootfsin your drives list) and opensipfront.txtwith a text editor. - Set the following configuration. If you did not yet create a custom agent pool, do so first in the Account > Agent Pools menu.
# the device will be accessible in your LAN via $AGENT_HOSTNAME.local
AGENT_HOSTNAME="sipfront-agent"

# fill in your Sipfront agent credentials
AGENT_POOL_ID="your-pool-id"
AGENT_POOL_SECRET="your-pool-secret"
AGENT_POOL_GROUP="raspi"

# fill in your WiFi credentials to enable wifi
AGENT_WIFI_SSID="your-wifi-ssid"
AGENT_WIFI_PASSWORD="your-wifi-pass"

# set to yes to enable mobile phone testing via bluetooth
AGENT_PHONE_DRIVER="yes"

# set http proxy if needed, otherwise leave empty
AGENT_PROXY=""
If everything went fine, you should see your agent (listed as raspi if you used the configuration above) online in the Account > Agent Pools menu.
Note
If you connect the Raspberry Pi to your network via Ethernet, you can skip the WiFi configuration by keeping the AGENT_WIFI_SSID and AGENT_WIFI_PASSWORD empty.
Option B: Linux host with a USB Bluetooth dongle
- Prepare the host as described in Running agents in a VM on your laptop: install QEMU, allow your user to use KVM, and add the udev rule for the dongle.
- Download and unpack the Sipfront agent VM for your host, e.g. sipfront-agent-vm-amd64-latest.tar.xz for an x86_64 laptop.
- Open
sipfront.txtin the unpacked directory and set the same configuration as above:AGENT_POOL_ID,AGENT_POOL_SECRET,AGENT_POOL_GROUPandAGENT_PHONE_DRIVER="yes". The Wi-Fi settings have no effect, the VM uses the host's network. - Plug in the USB Bluetooth dongle and start the VM with
./run.sh. It reboots once to enable the Bluetooth stack, downloads the Sipfront agent image and connects to the Sipfront infrastructure;./stop.shfrom another terminal shuts it down again.
After a few minutes the agent shows up online in the Account > Agent Pools menu, exactly like a Raspberry Pi. The phone pairing and the downloaded agent image are kept on the VM disk, so later starts are quick and the phone reconnects on its own.
What AGENT_PHONE_DRIVER="yes" changes
With the phone driver enabled, the device (Raspberry Pi or VM) starts the Bluetooth hands-free stack and runs the agent as the sipfront-agent-mobile runtime. That runtime announces only the mobile_call capability to Sipfront, so the scheduler sends this agent real mobile phone calls exclusively and never regular SIP, DNS or browser test actions. If you also want to run regular SIP tests from the same location, use a second Raspberry Pi or VM (or any other agent) with AGENT_PHONE_DRIVER="no". The runtime can be overridden with SF_AGENT_RUNTIME in sipfront.txt (see the advanced configuration), which is normally only needed on request by Sipfront support.
Connecting your phone
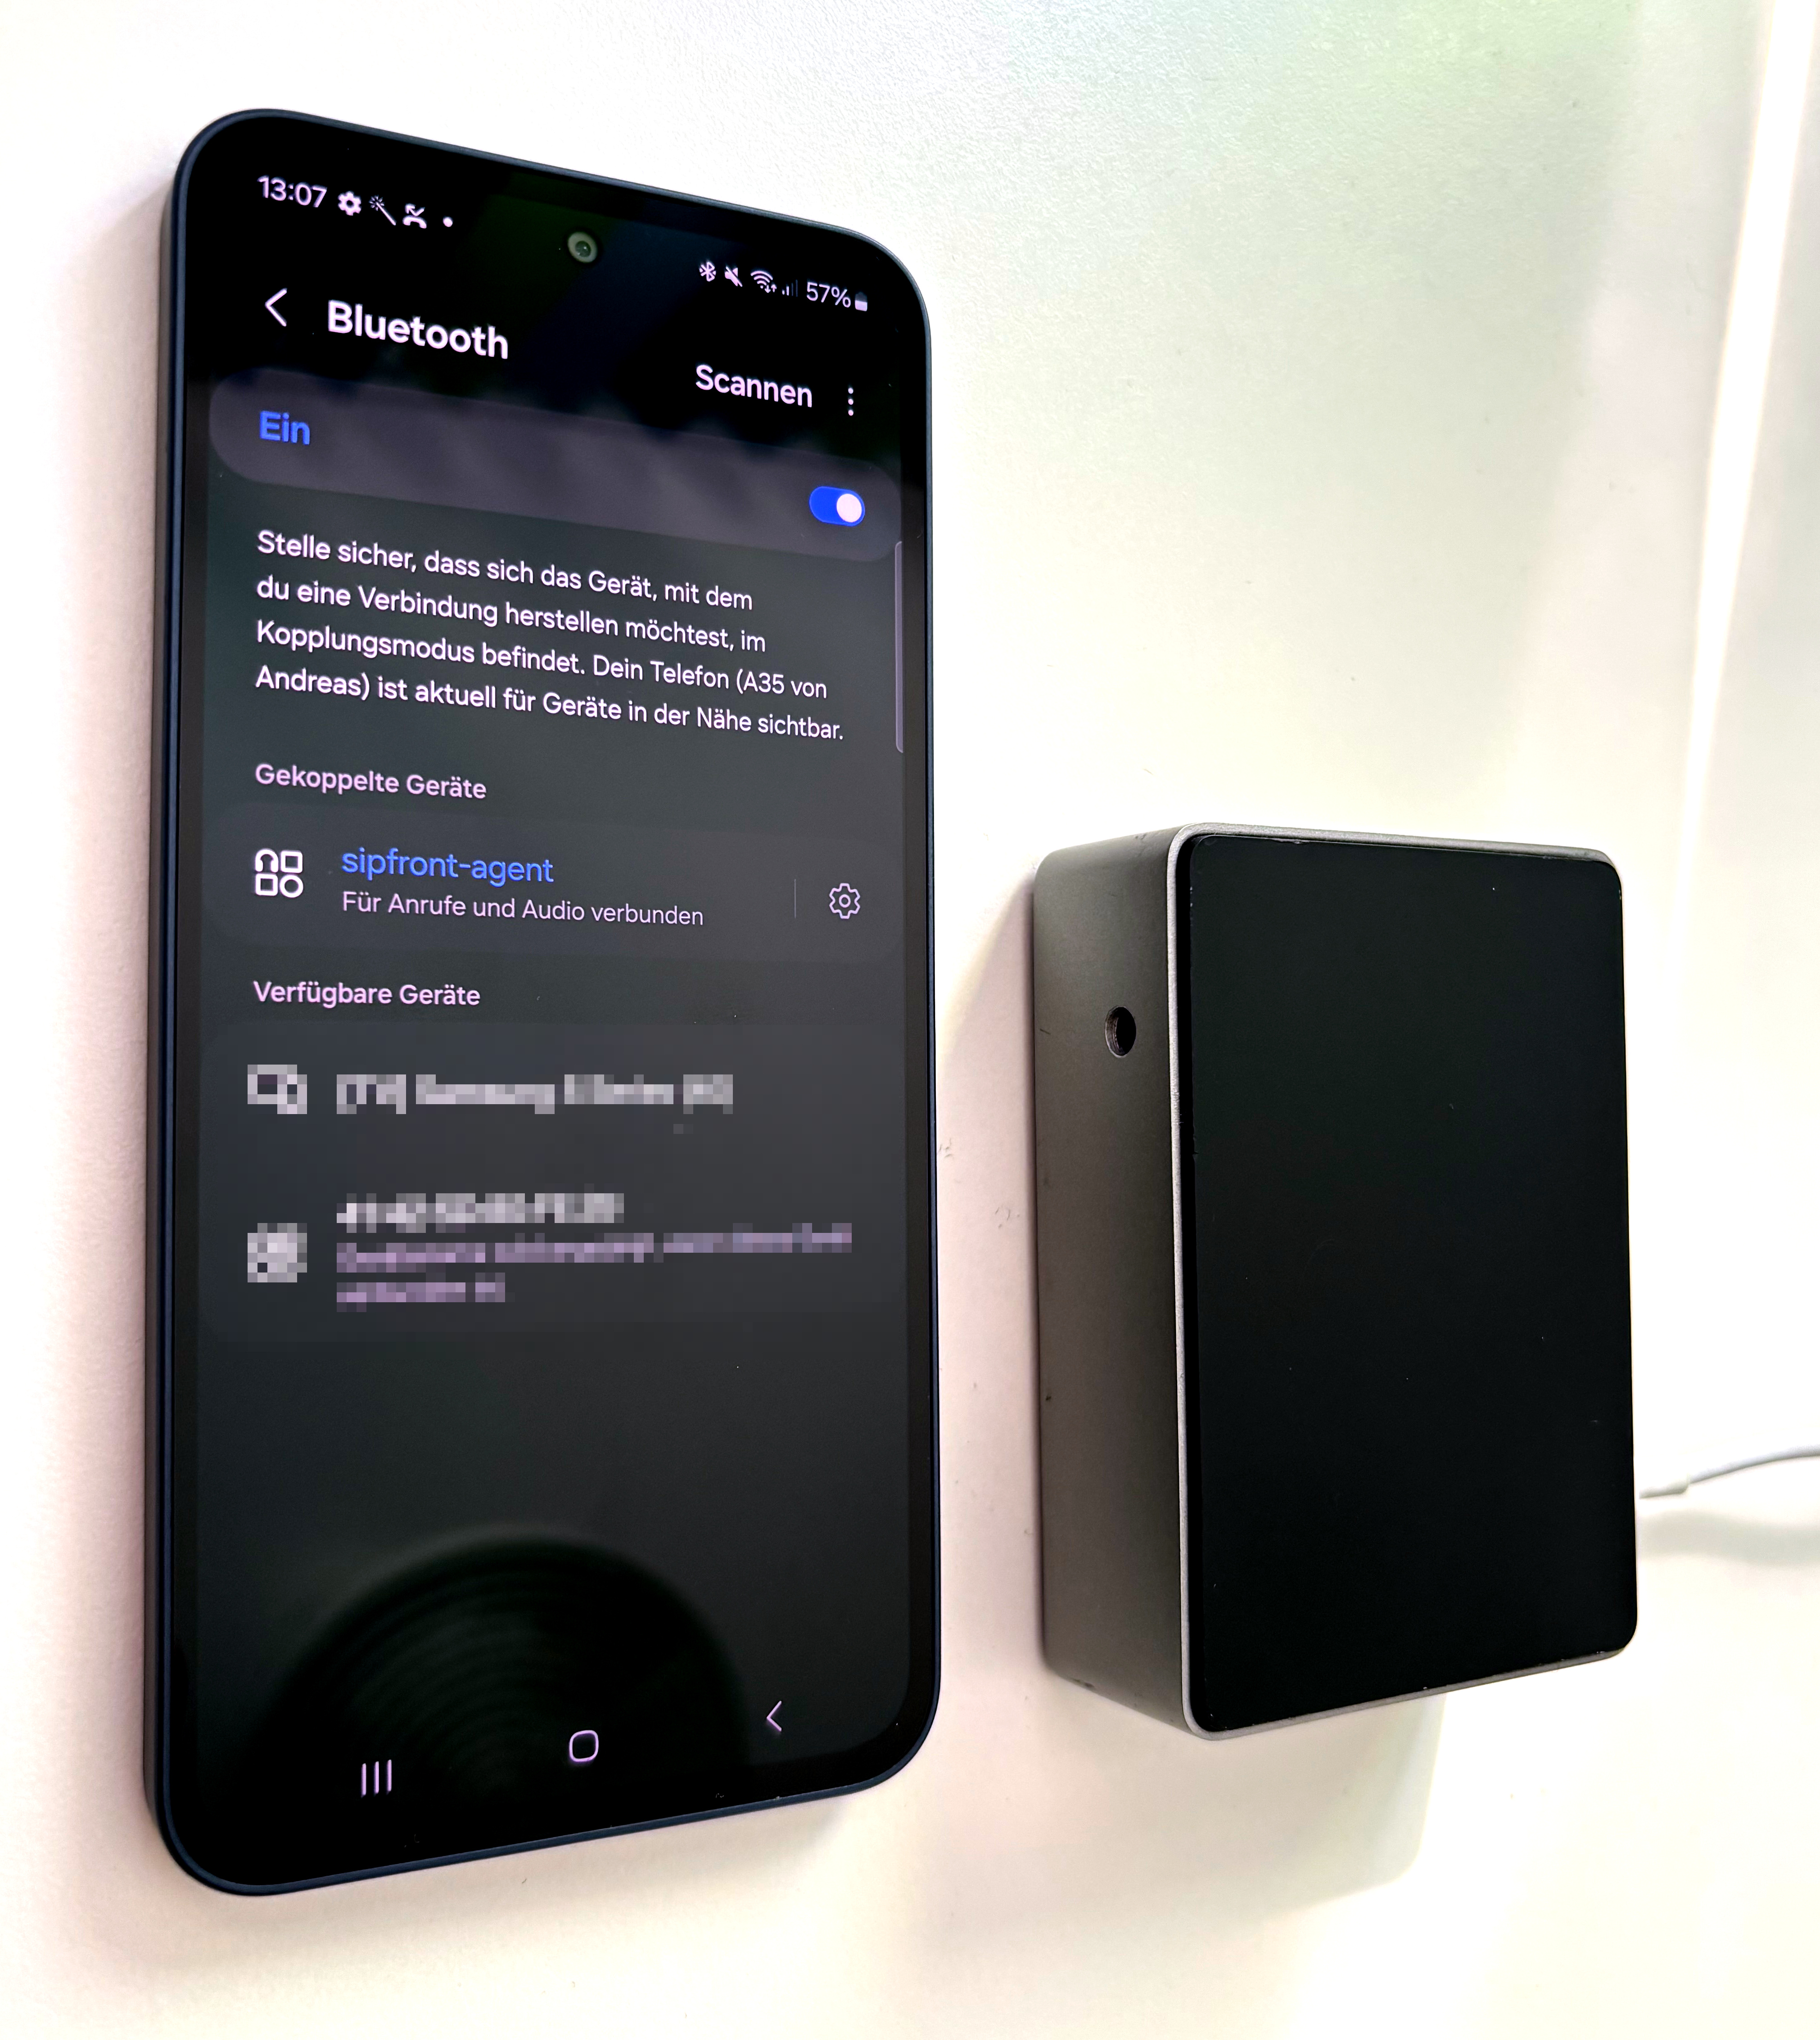
The mobile agent is discoverable as a Bluetooth hands-free device under its AGENT_HOSTNAME (sipfront-agent for the Raspberry Pi, sipfront-vm for the VM, unless you changed it in sipfront.txt). Pairing is accepted automatically, no PIN or confirmation is needed on the agent side, and the phone reconnects on its own after a reboot of the agent or the phone.
iPhones
- On your phone, navigate to
Settings > Bluetoothand enable Bluetooth. - In the list of available devices, you should see
sipfront-agentorsipfront-vm(or theAGENT_HOSTNAMEyou set in thesipfront.txtconfig file) listed. Tap on it to connect. - If it asks you to allow syncing contacts etc., allow it.
Note
The sipfront agent will NOT download any contacts or personal information from your phone, nor use it in any way.
Android Phones
- On your phone, navigate to
Settings > Connections > Bluetoothand enable Bluetooth. - In the list of available devices, you should see
sipfront-agentorsipfront-vm(or theAGENT_HOSTNAMEyou set in thesipfront.txtconfig file) listed. Tap on it to connect. - If it asks you to allow syncing contacts etc., allow it.
Note
The sipfront agent will NOT download any contacts or personal information from your phone, nor use it in any way.
Warning
If you have trouble connecting your phone to the agent, e.g. it says it cannot connect via Bluetooth, make sure to forget the agent on the phone first (use ignore device or something similar in your bluetooth settings) in case the phone was previously paired with it, e.g. with an earlier image or VM.
Create your first test
- In the Sipfront app, navigate to an existing test project or create a dedicated project for your mobile phone tests.
- Click the
Create new testbutton at the top. - Give it a descriptive name and description.
- Select the
Mobile call - Calling Party Onlytest scenario, which is the most simple mobile test to start with. - Under
Choose agent pool, select the agent pool you configured in yoursipfront.txtconfiguration file. - Under
Agent Groupin theConfigure your callerselectraspi(or the group you defined inAGENT_POOL_GROUPin yoursipfront.txt). Note that the group only becomes available once the Sipfront agent on your Raspberry Pi or VM is online. If it's missing, it's a good indicator that there is a general configuration problem with the device. - Enter the phone number you'd like to call in the
Dial Destionationfield of the section below, and optionally adapt theStop after time limit(e.g. setting it to30for a first quick test). - At the bottom, click
Save & Run.
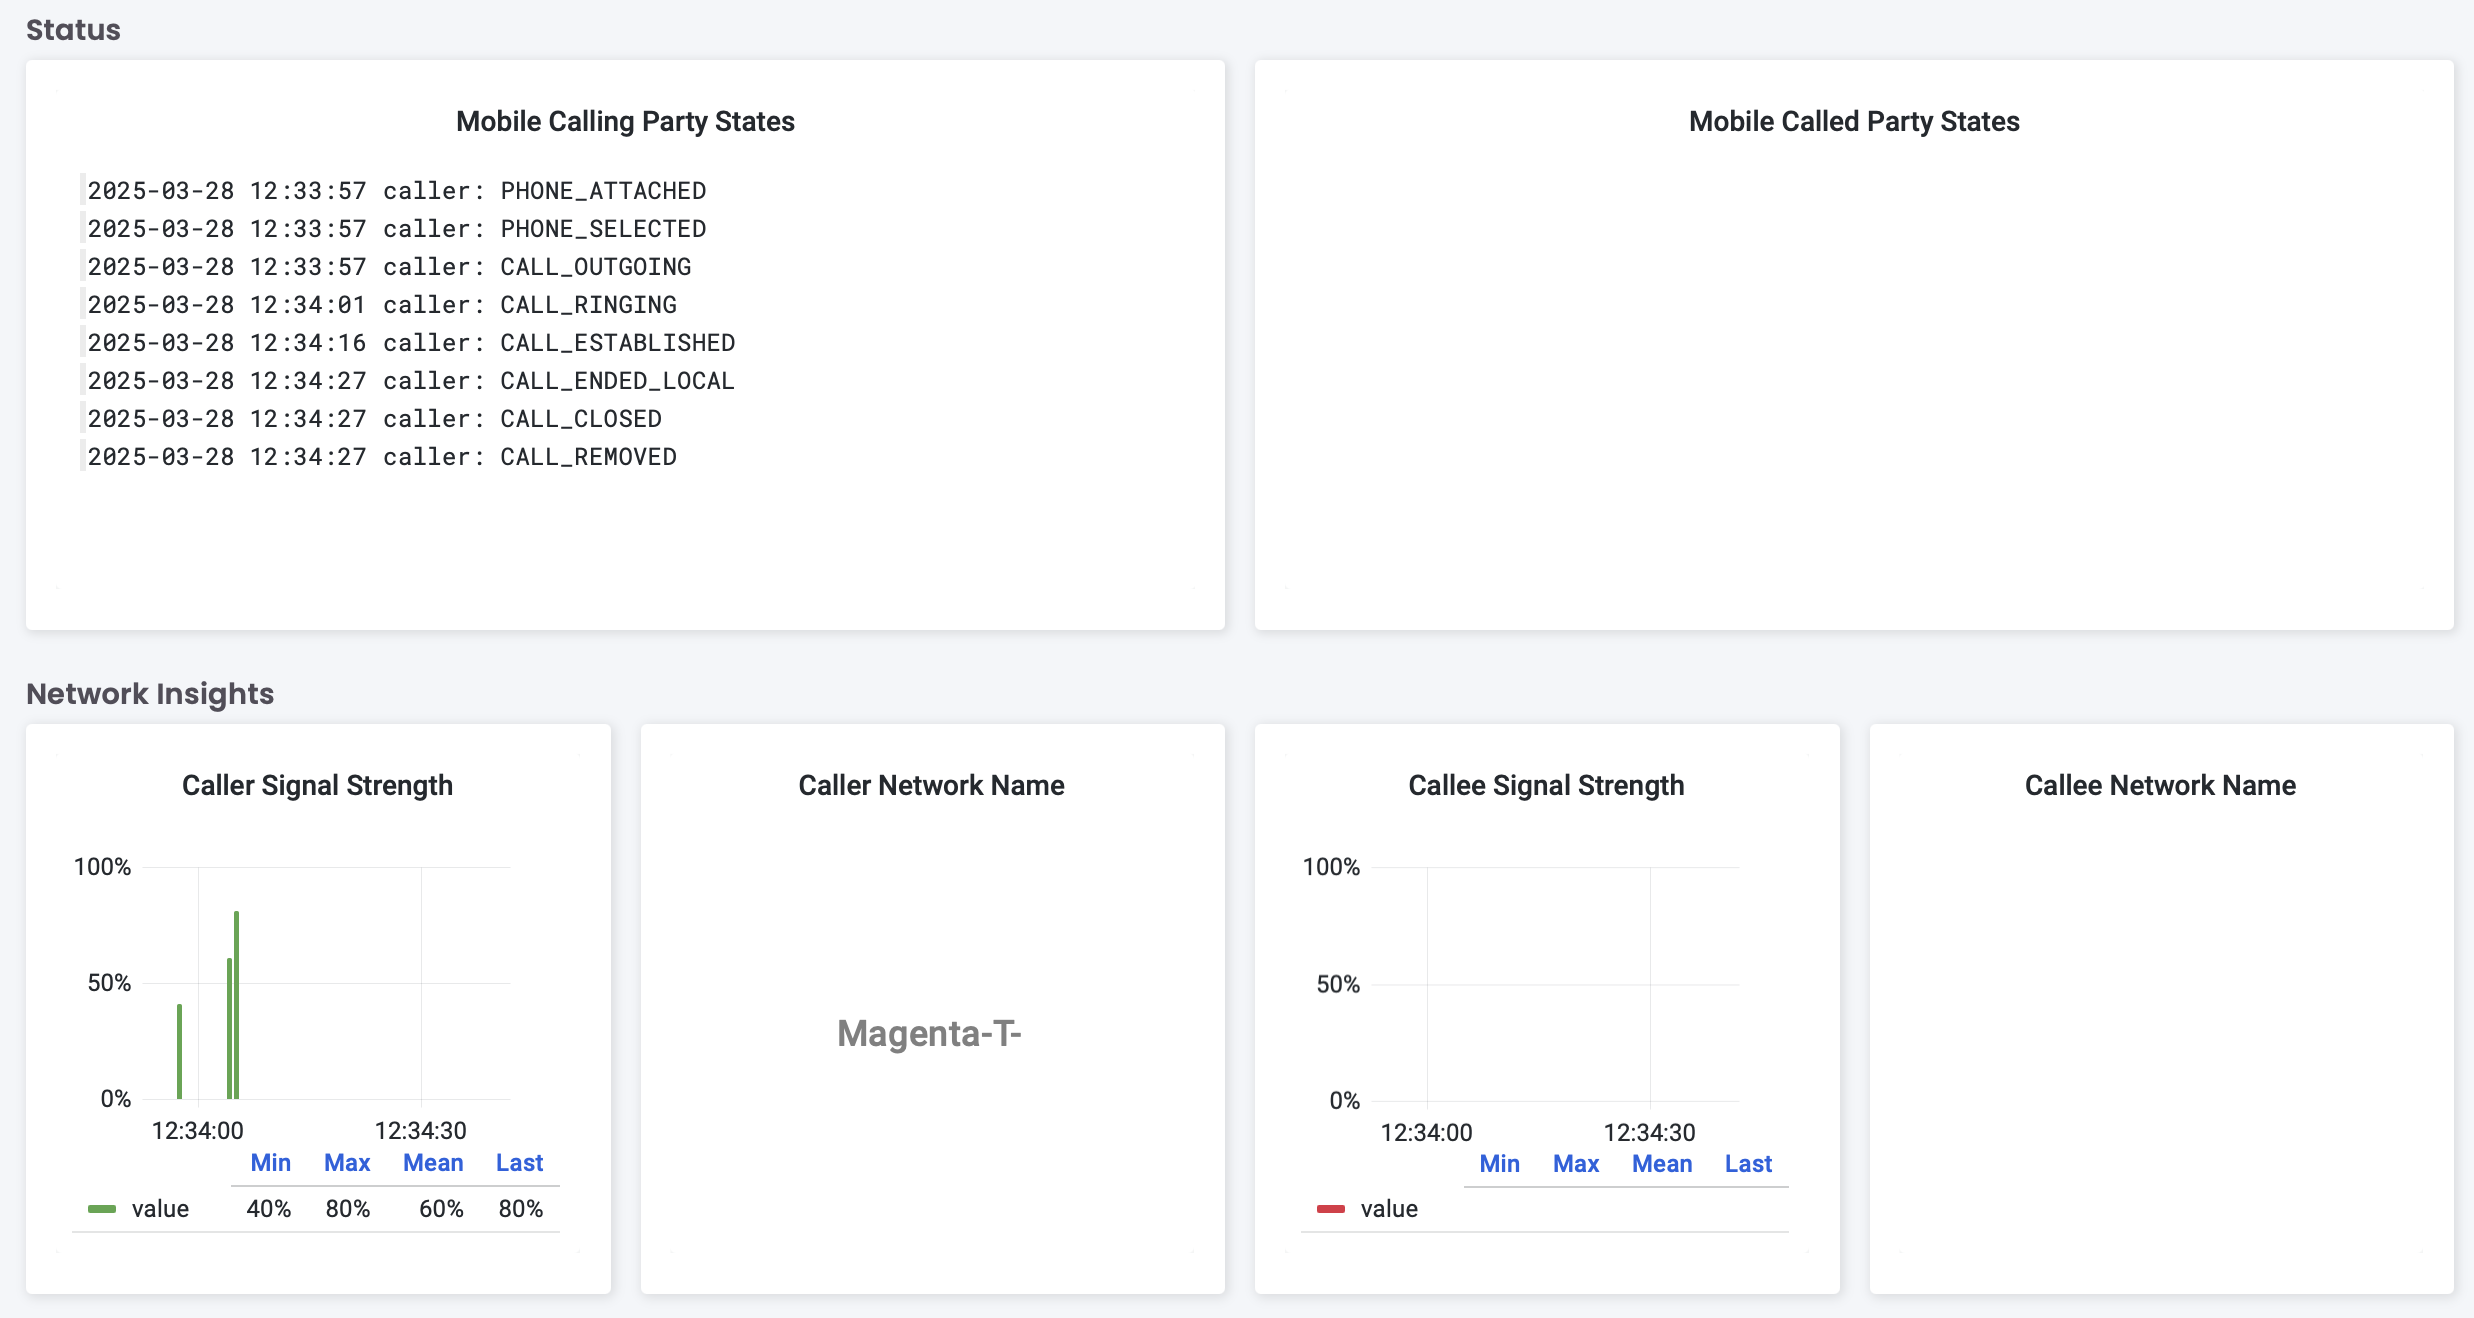
This should trigger the test to run, and you should see the phone coming to life automatically after a few seconds, displaying the native dialer screen and showing the call being placed to the destination number you specified.
Warning
Since audio is running via bluetooth, you might experience distortions in the audio if both parties are talking at the same time. This is something we are working on to improve in the future, possibly by injecting and recording audio via a USB connection between the phones and the agent.
To temporarily overcome this issue e.g. for voice quality tests, it's best to utilize the call actions and mute audio on one end while playing audio on the other end.